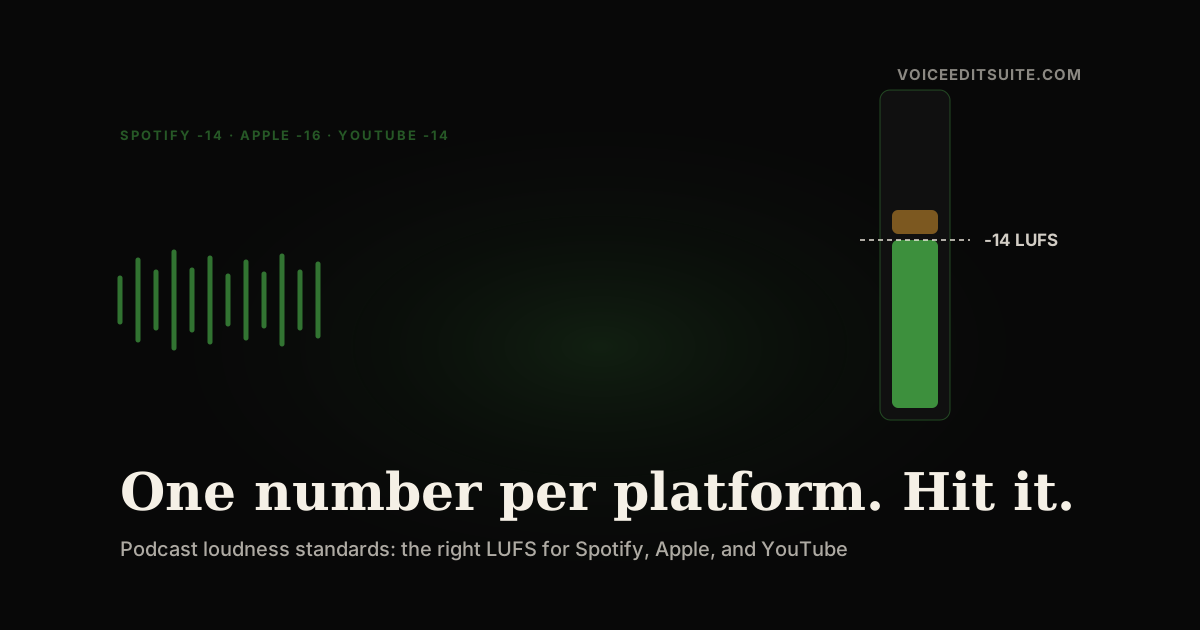
Play your episode back to back against a big show and yours sounds smaller. Or worse, you pushed it louder to compete and the platform turned it down anyway, taking your carefully balanced mix with it. Both problems have the same cause: every major platform normalizes audio to a loudness target, and your export either hits that number or gets corrected for you.
This guide covers the actual targets each platform uses, what LUFS and true peak mean in plain English, and the export routine that hits the spec on the first try instead of the third.
What LUFS Actually Measures
LUFS (Loudness Units relative to Full Scale) measures how loud your audio feels to a human ear over time, not how tall the waveform is. A whispered hour and a shouted hour can have the same peak level but wildly different LUFS. When a platform says it targets -14 LUFS, it means the integrated loudness of your whole file, averaged start to finish.
The second number that matters is true peak, measured in dBTP. That is the maximum level your audio hits once it has been converted back to an analog wave, which can be slightly higher than the tallest sample in your file. Platforms want true peak at -1 dBTP or lower, because lossy encoders like MP3 and AAC overshoot: a file peaking at exactly 0 will distort after encoding even though it looked clean in your editor.
The Targets, Platform by Platform
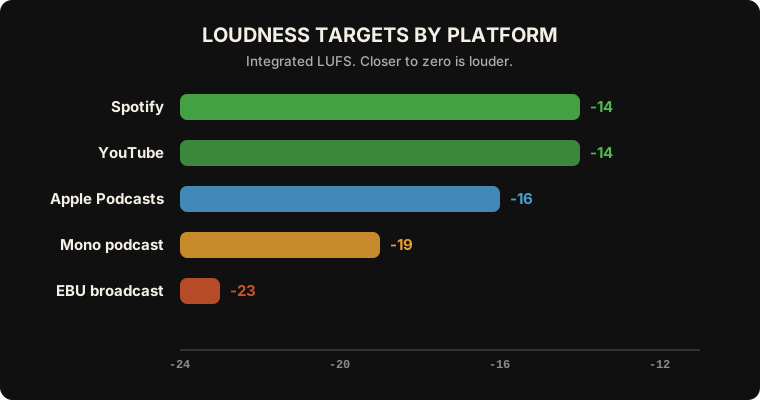
- Spotify: -14 LUFS, true peak -1 dBTP (Spotify recommends -2 dBTP if your master is louder than -14, to survive their encoder).
- YouTube: -14 LUFS. YouTube only turns loud content down, it does not turn quiet content up, so a quiet upload stays quiet.
- Apple Podcasts: -16 LUFS, true peak -1 dBTP. Apple's spec is the de facto standard for stereo podcasts.
- Mono podcasts: -19 LUFS. Mono at -19 sounds as loud as stereo at -16 because of how loudness is summed. If you deliver mono voice, use this.
- EBU R128 broadcast: -23 LUFS. Television and radio. Much quieter than streaming, with strict tolerance.
If you only pick one number
Master podcasts to -16 LUFS with true peak at -1 dBTP. Apple gets exactly what it asks for, and Spotify turns it up cleanly, which is harmless. Mastering to -14 and getting turned DOWN is also harmless. The only real mistake is being wildly off in either direction.
Why 'Just Make It Louder' Backfires
The loudness war logic says louder sounds better, so push the limiter until the meter maxes out. On normalized platforms this achieves nothing: a file mastered to -9 LUFS gets turned down to -14 on Spotify, and what remains is the damage you did getting there. Crushed dynamics, audible pumping, listener fatigue, and a voice with no room to breathe.
The opposite failure is subtler. A quiet export at -22 LUFS gets turned up by some platforms, and everything comes up with it: the hiss between your sentences, the hum of your interface, the neighbor's lawnmower. Normalization does not distinguish voice from noise. If your noise floor was borderline before the boost, it is audible after.
↗ Try the tool
Studio Rescue
If leveling your episode brought a bed of hiss or hum up with it, the noise was always there, just quieter. Studio Rescue strips it out while leaving the voice untouched, and shows you the measured noise floor before and after. Clean first, then level.
Open Studio Rescue →How to Hit the Target on the First Export
- Clean and edit first, level last. Loudness is the final step. If you normalize and then keep editing, the numbers drift.
- Measure, don't guess. Your editor's output meter shows peaks, not LUFS. Use a loudness meter or a tool that reports integrated LUFS for the whole file.
- Use two-pass normalization when you can. A first pass measures the real loudness of your file, a second pass applies the exact correction. Single-pass 'live' normalization estimates as it goes and can miss the target by 1 to 2 LU on dynamic speech.
- Check true peak after encoding, not before. If your workflow allows it, verify the delivered MP3 or AAC, not just the WAV master.
- Keep one target per show. Listeners notice episode-to-episode loudness jumps more than they notice absolute level. Consistency is the spec behind the spec.
↗ Try the tool
Loudness Normalizer
The Loudness Normalizer has presets for every target on this page: Spotify, Apple Podcasts, YouTube, mono podcast, and EBU broadcast. It runs true two-pass loudnorm, so the file you download measures what the preset promised, including the -1 dBTP true peak ceiling. Drop the file, pick the platform, done.
Open Loudness Normalizer →The 30-Second Pre-Publish Check
- Integrated LUFS within 1 LU of your platform target.
- True peak at -1 dBTP or lower.
- Listen to the quietest passage: can you hear the room? If yes, clean before you level.
- Same target as last episode. Consistency beats perfection.
Loudness is one of the few parts of this craft with an actual right answer. Find your platform's number, master to it, and spend the time you save on the part that has no preset: the read itself.