You listen back to a take and there it is: a bed of hiss under every word, a low hum that never stops, or the soft wash of a fan you swore you turned off. The read is good. The noise is not. And re-recording is not always an option, because the client is waiting, the session mood is gone, or the location no longer exists.
The good news is that in 2026, most noisy voice recordings are genuinely saveable. The bad news is that most people reach for the wrong fix first, and end up with a voice that sounds like it is underwater. This guide covers what kind of noise you actually have, the free fixes that work at the source, and when software rescue is the right call.
First, Figure Out What Kind of Noise You Have
Noise removal fails when you treat all noise as the same problem. Listen to a quiet gap between sentences on headphones and place what you hear into one of four buckets.
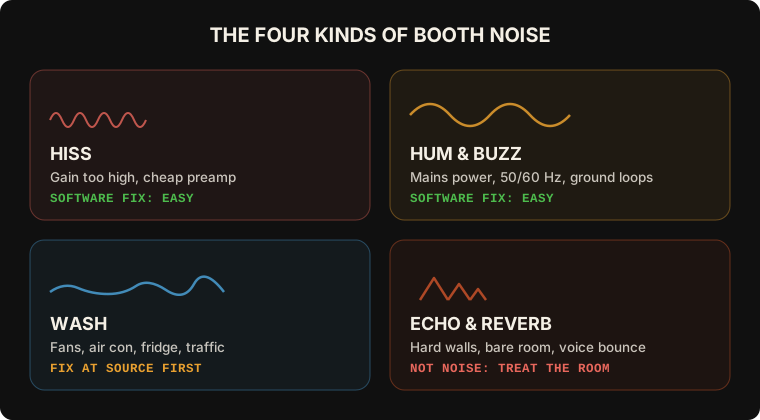
- Broadband hiss. A constant 'ssshhh' across the whole recording. Usually the gain on your interface turned up too far, a cheap preamp working too hard, or a USB mic at its limit. This is the easiest noise to remove in software.
- Hum and buzz. A steady low tone at 50 or 60 Hz (and its harmonics) from mains power: a ground loop, a cheap power supply, a dimmer switch on the same circuit. Constant, predictable, very fixable.
- Wash. The blended roar of a computer fan, air conditioning, a fridge two rooms over, or distant traffic. Broadband like hiss but often louder and slightly uneven. Fixable in software, better fixed at the source.
- Echo and reverb. Your voice bouncing off hard walls and arriving late. This one matters: reverb is not noise, and noise removal cannot fix it. The reflections are baked into the voice itself. If your problem is a ringing room, the fix is acoustic treatment, not a plugin.
Quick test
Record 10 seconds of silence in your booth, then raise the playback volume until you hear the room. Whatever you hear first is your dominant noise source, and the thing to fix first.
Fix It at the Source First (All of This Is Free)
Every hour spent cleaning noise in software is an hour you would not have spent if the noise never reached the microphone. Before any processing, run through this list. Most working voice actors find at least two items they can fix today.
- Drop your gain, get closer to the mic. Hiss usually means your preamp is amplifying everything, including itself. Halving the distance to the mic gains you roughly 6 dB of voice, which lets you pull the gain down and take the hiss down with it.
- Put the computer out of the room, or at least under a blanket-draped desk. The single loudest thing in most home studios is the machine recording the audio.
- Kill the climate control for the length of a take. Thirty minutes of warm booth beats a noise floor failure.
- Chase the hum. Unplug devices one at a time while monitoring. Ground loops love laptop power bricks and audio interfaces on different outlets. Getting everything onto one power strip fixes more hum than any plugin.
- Record 3 seconds of room tone at the top of every session. Whatever cleanup you do later works better with a clean sample of the room, and audiobook platforms require room tone anyway.
↗ Try the tool
Home Studio Analysis
Not sure what your room actually sounds like? Read a 30-second script, upload it, and Home Studio Analysis gives you a measured report: reverb tail in milliseconds, noise floor in dB, hum, sibilance, and level control, with a practical fix for each problem. It measures the same way ACX measures, and it costs nothing.
Open Home Studio Analysis →What Noise Removal Software Actually Does (and Why Old Tools Hurt Your Voice)
Classic noise reduction (the kind built into most editors for the last twenty years) works by spectral subtraction: you show it a noise sample, and it subtracts that fingerprint from the whole recording. Push it gently and it helps. Push it hard and you get the famous artifacts: a hollow, swirly, 'underwater' voice, chirpy metallic edges on the consonants, and breaths that cut off unnaturally.
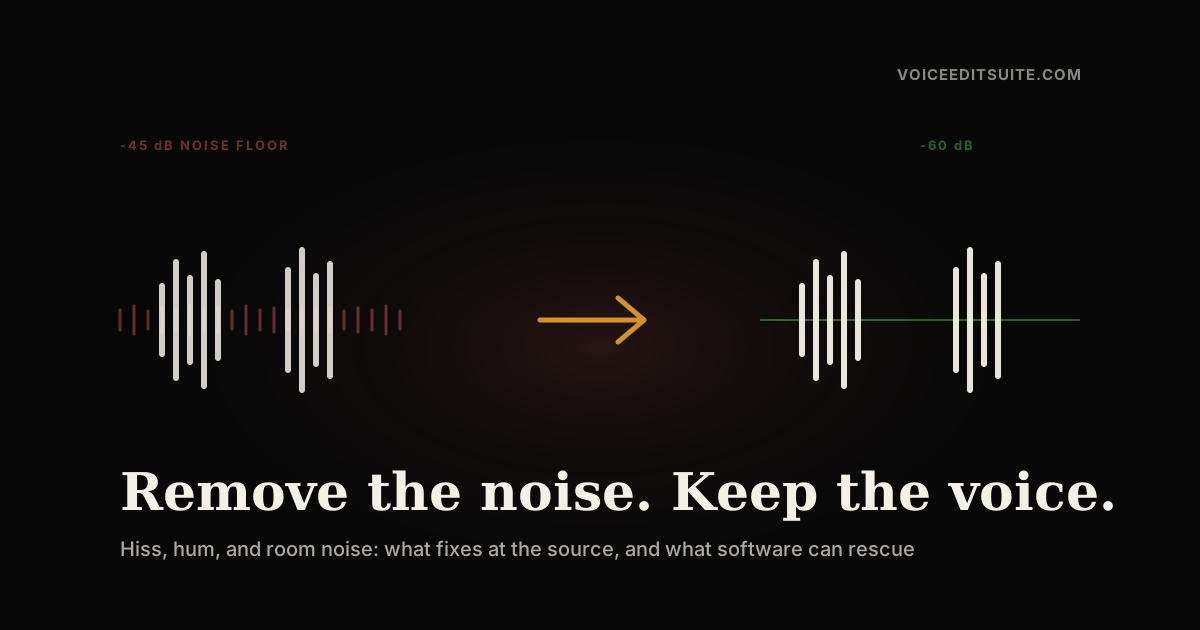
Modern neural noise suppression works differently. Instead of subtracting a fingerprint, a model trained on thousands of hours of speech learns what a human voice is, and rebuilds the recording keeping the voice while discarding everything that is not. Run well, it can take a recording from a noise floor of -45 dB (a clearly audible hiss bed) to below -60 dB (silence to the ear) while the voice itself stays natural.
Three honest caveats, because no tool is magic:
- Extreme processing can leave a sheen. On badly damaged audio, aggressive suppression can leave the voice sounding slightly processed. Always listen to the result before sending it to a client. Your ears are the final QC.
- It cannot remove reverb. Worth repeating. A boomy room needs treatment, not denoising.
- It cannot fix clipping. If the recording distorted on the way in, that damage is permanent. Re-record.
The Right Order of Operations
Cleanup order matters more than people think. Processing in the wrong order bakes noise into your delivered file.
- Denoise first, on the raw file. Noise removal works best on untouched audio, before any EQ or compression has changed the noise's character.
- Edit second. Cut the takes, tighten the gaps, remove the fluffs.
- Level last. Normalize or master to your delivery spec (ACX, podcast, broadcast) as the final step. If you normalize first, you raise the noise floor along with the voice, then have to remove more noise, then re-normalize. One pass, right order, done.
The -60 dB Question: Why Audiobook Narrators Care Most
If you deliver audiobooks, noise floor is not a taste question, it is a pass/fail spec. ACX requires the noise floor of every uploaded file to sit at -60 dB RMS or lower. A comfortable home setup with an audible fan typically measures between -42 and -50 dB, which fails, and ACX rejections arrive days after you submit, costing you the remix and the re-upload wait.
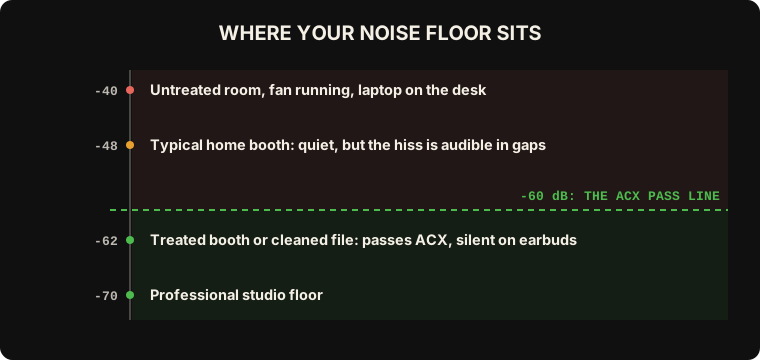
This is exactly the case where source fixes plus modern denoising earn their keep: a raw recording measuring -45 dB can come out the other side below -60 dB with the voice intact, which is the difference between a rejected audiobook and an approved one.
↗ Try the tool
Studio Rescue
The take is noisy and the client is waiting? Upload the recording and Studio Rescue strips the hiss, hum, and room noise while leaving your voice untouched. It runs on our own servers (your audio never goes to a third party), and it measures your noise floor before and after so you see the real improvement in dB, plus before/after players so your ears make the final call.
Open Studio Rescue →A 60-Second Checklist Before You Deliver
- Listen to a gap between sentences at high volume on headphones. Hear anything? That is what your client hears on earbuds.
- If you cleaned the file, listen to three random sentences for artifacts: hollow tone, metallic consonants, clipped breaths.
- Delivering to ACX? Confirm the noise floor measures -60 dB or lower on the finished file, not the raw one.
- Keep the raw recording. If a client asks for a different treatment later, you want to start from the original, not from processed audio.
Noise is the most fixable problem in voice over. Fix what you can at the source, use modern tools for what remains, and let a measurement, not a guess, tell you when the file is clean.