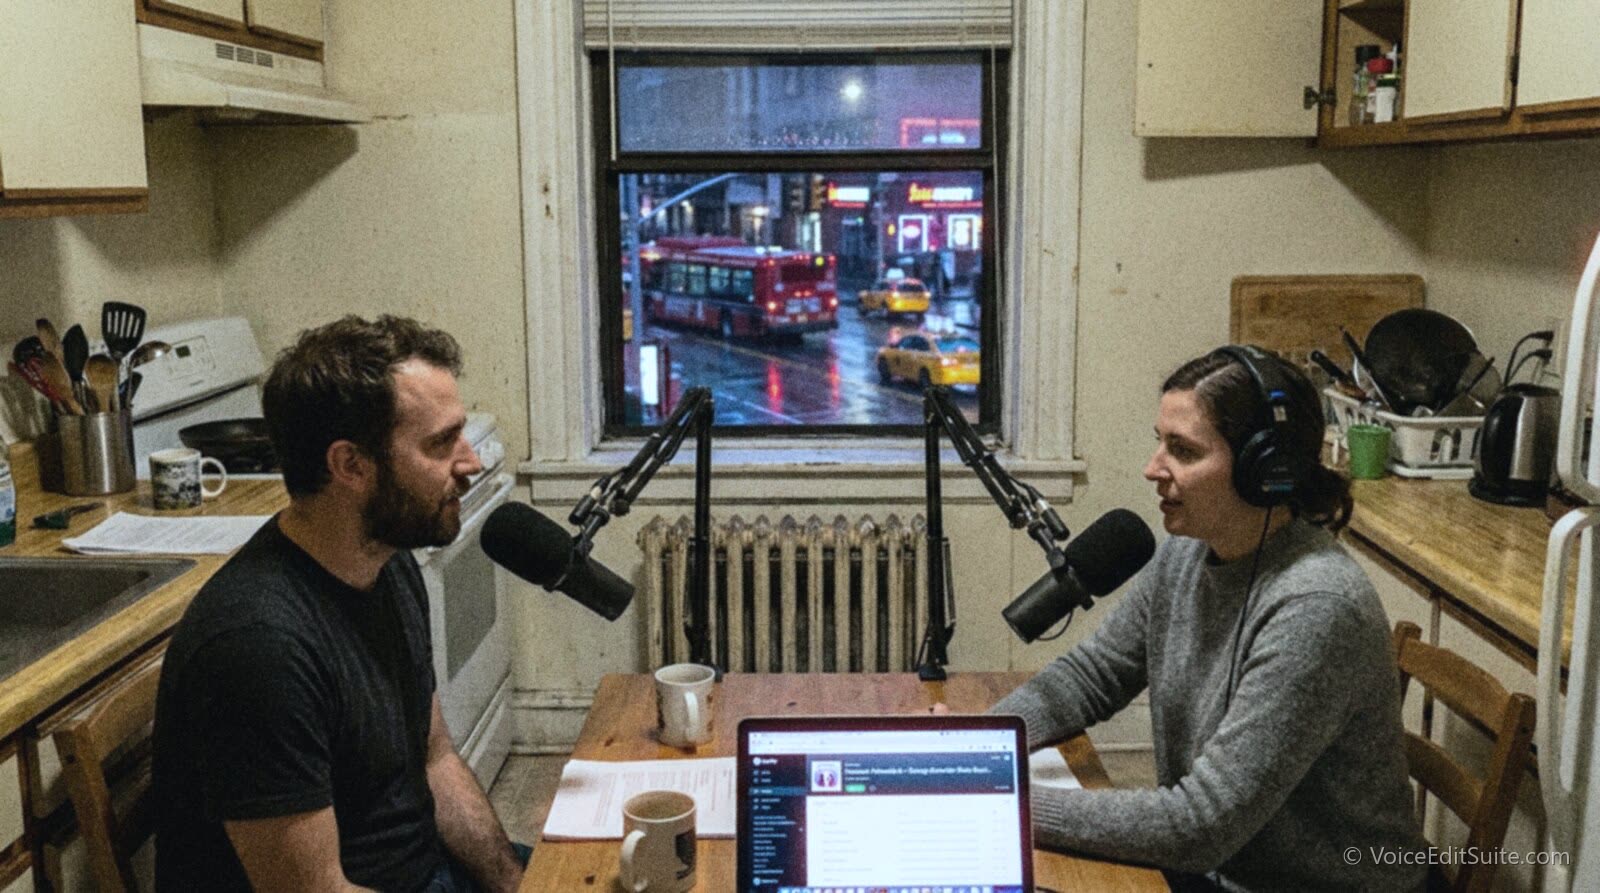
To remove background noise from podcast audio, work out which kind of noise you have, run each person's track through an AI noise remover before you edit anything, and set the final loudness last. Steady noise such as hiss, mains hum, fans, air conditioning and distant traffic comes out cleanly with modern tools. Echo, a siren on top of a word and distorted peaks do not, so those are fixed at the recording, not afterwards.
That is the whole method in three sentences, and the rest of this Guide is the detail behind it: how each noise sounds so you can name it, the free fixes that stop most of it before you press record, how an AI audio cleaner actually separates a voice from noise, the artifacts that tell you it went too far, and the order of operations that keeps you from doing the job twice. Whether you need to remove background noise from audio for a weekly show or a single narration, the method is the same. It is written for podcasters first, with separate tracks per person and guests on bad laptop mics, but every step applies to a voice actor cleaning a single narration file too.
It is worth getting right. In a 2018 study published in Science Communication, Eryn Newman and Norbert Schwarz played people the same conference talks and radio interviews with good and with degraded audio. With poor audio, listeners rated the research as less important and the speaker as less intelligent and less likeable, even though the words were identical. The content was the same; the sound changed how it was judged. We go through that research and the wider evidence in Does Bad Audio Make People Stop Listening?.
The short version
Name the noise. Kill what you can at the source. Clean each voice track separately, noise first. Then edit breaths, false starts and dead air. Then set loudness once, at the very end, and measure the finished file.
First, Identify Which Noise You Have
Every audio noise remover is good at some noises and bad at others, so the first job is a diagnosis. Put on closed headphones, find a pause where nobody is talking, and turn the playback up further than you normally would. What you hear in that gap is your noise floor, and it nearly always falls into one of five families.
Hiss
A steady, airy "shhh" that sits under everything and is most obvious in the pauses. It is broadband, meaning spread across the whole frequency range, with most of its energy in the upper frequencies where it sounds like tape or a detuned radio. Hiss usually comes from turning the gain up a long way on a cheap preamp or interface, often because the speaker is too far from the microphone and the level had to be pushed to compensate. It is the easiest noise for software to remove, and also the easiest to avoid by working closer to the mic.
Hum and buzz
A low, steady tone, sometimes with a harsher buzz on top. Mains electricity runs at 50 Hz in Europe, Australia and most of Asia and Africa, and at 60 Hz in North America, so electrical hum sits at one of those frequencies plus a stack of harmonics above it: 100, 150, 200 Hz and so on, or 120, 180, 240 Hz. The buzz is those upper harmonics. Typical causes are a ground loop between a laptop on its charger and an interface, audio cables run alongside power leads, a dimmer switch, or a fridge compressor in the next room. Because hum is a fixed set of tones it is very removable, but the cable fix is free and permanent, and we walk through diagnosing it in Ground Loop Hum and Electrical Noise.
Broadband room noise
A wash of air rather than a hiss: the computer fan, the air conditioner, a ceiling fan, the low rumble of traffic through a closed window, a refrigerator, a server cupboard. It is steady or slowly changing, it often has more low-end weight than hiss, and you stop noticing it in the room after a few minutes, which is exactly why it ends up on recordings. AI noise removal handles it well as long as it stays roughly constant through the episode.
Intermittent noise
Anything that comes and goes: a dog, a siren, a door, a delivery van, a co-host's keyboard, a chair creak, a phone buzzing on the desk. These are the hardest. A noise remover has to recognise a sound it has only just started to hear, and when the noise lands on top of a word, the voice and the noise share the same frequencies at the same moment. Modern neural tools reduce a lot of intermittent noise in the gaps between words, but a bark on top of a sentence will usually survive in some form. The reliable fixes are cutting it during the edit or recording the line again.
Echo and reverb
Not really background noise, though it is constantly confused with it. A voice in a bare room arrives at the microphone directly and then again, a few milliseconds later, off every hard surface. It sounds hollow, distant, "in a bathroom", with a short ringing tail after each word. The key fact is that reverb is your own voice, delayed. A noise remover keeps voices, so it keeps the reverb. Some dedicated dereverberation tools can reduce it a little, but the real fix is in the room: soft furnishings, a closet full of clothes, or simply moving the mic closer. Our bedroom podcast Guide covers that in detail.
If you would rather measure than guess, record 30 seconds of yourself reading in your usual spot and run it through the free Home Studio Analysis. It needs no account and reports your echo, noise floor, hum and sibilance as numbers, which tells you whether you are dealing with a noise problem that software can solve or a room problem that it cannot. That distinction saves more time than anything else in this Guide.
Prevent It at the Source (the Free Fixes)
The best AI noise removal in the world works better on a file that needed less of it. Removing a small amount of noise is nearly invisible; removing a lot always costs the voice something. These fixes take minutes and cost nothing, and together they often lower the noise floor more than any plugin.
- Get closer to the microphone. Sound from a small source falls off quickly with distance: halving the distance from your mouth to the mic raises your voice by roughly 6 dB relative to the room, so you can turn the gain down and the hiss and room noise go down with it. A fist or two from a dynamic mic is a sensible starting point.
- Turn things off for the length of the recording. Air conditioning, ceiling fans, heaters with fans, dehumidifiers, the fridge if it is near the room. Put a note on the fridge so you remember to plug it back in.
- Move the computer. A laptop fan under load is one of the most common podcast noises. Move it to arm's length, close heavy apps, or put a desk between it and the mic.
- Shut the window and choose your hour. Traffic and neighbours are quieter late at night or early in the morning, and a closed window with a heavy curtain drawn over it removes far more street noise than an open one. Our window soundproofing Guide has the no-construction options.
- Separate audio and power cables, and try one power point. If you hear hum, plug the laptop and interface into the same outlet, unplug the laptop charger as a test, and keep audio cables away from power leads.
- Soften the room. A duvet behind the microphone, a rug on a hard floor, books and a sofa. This is the echo fix, and it is the one thing no software can do for you afterwards.
- Record ten seconds of silence. Before you start talking, everyone sits still for ten seconds. That is your room tone: it shows you your noise floor, and it gives editing tools clean material to fill gaps with later. More in Room Tone and Noise Floor.

How quiet is quiet enough? Podcast platforms do not publish a noise floor requirement, but audiobook publishing does, and it is a useful benchmark. ACX, the audiobook platform, requires a noise floor no higher than -60 dB RMS, measured in the silence between words. A podcast does not need to meet that, but a pause that measures around there will sound clean on any pair of earbuds. A pause at -45 dB or higher is noise listeners will hear on headphones, and it will rise further when the final loudness pass turns the whole file up.
How AI Noise Removal Actually Works
You do not need the maths to use an AI audio cleaner, but a rough idea of what is happening inside one explains why it handles some noises well and others badly, and what the strange sounds are when it goes wrong.
The classic method: spectral subtraction
Software noise reduction for speech goes back at least to 1979, when S. F. Boll published a method called spectral subtraction in the IEEE Transactions on Acoustics, Speech, and Signal Processing. The idea is simple. Split the audio into a sequence of very short frames, look at how much energy each frame has at each frequency, estimate what the noise looks like from the moments when nobody is speaking, and subtract that noise estimate from every frame. Boll tested it on speech recorded in a helicopter.
It works for steady noise, and it is still the basis of the "capture a noise profile" tools found in many editors. Its weakness is well known: where the subtraction leaves small, random leftovers scattered across the spectrum, they turn into brief, watery tones that come and go. Engineers call this "musical noise", and it is the burbling, underwater sound of a file that has been over-cleaned with an older tool. The method also assumes the noise does not change, so a fan that speeds up or a passing car breaks the estimate.
The modern method: neural speech enhancement
Modern AI noise removal keeps the frequency-by-frequency idea but replaces the hand-tuned rules with a neural network trained on very large amounts of clean speech mixed with real noise. Instead of being told what the noise is, the network learns what speech looks like and estimates, for every small slice of time and frequency, how much of the signal is voice. It then keeps that part and turns the rest down.
Two openly published systems show how this works. RNNoise, described by Jean-Marc Valin in a paper presented at MMSP 2018, is a hybrid: conventional signal processing does most of the work, and a small recurrent neural network estimates a gain for each of 22 frequency bands, frame by frame, with a pitch filter that lets the harmonics of the voice through while reducing the noise between them. Valin notes that working in broad bands avoids the musical noise of older methods, and that the network has memory, which matters because it takes time to build a good estimate of the noise. DeepFilterNet, from Hendrik Schröter and colleagues at ICASSP 2022, works in two stages: the first shapes the overall spectral envelope on a scale modelled on human hearing, and the second applies what the authors call deep filtering to restore the periodic, pitched parts of speech in finer detail. Both were designed to run with low computational cost on full-band audio, which is why this kind of cleanup is fast enough to run on a long episode.
What both have in common is the important part for a podcaster. They do not need a noise profile, they adapt as the noise changes, and they are judged on how natural the voice sounds afterwards, not just on how much noise disappears. The research community scores noise suppressors under an ITU standard, P.835, that asks listeners to rate the speech, the background and the overall result separately, precisely because removing more noise can make the voice worse. Microsoft's Deep Noise Suppression Challenge, which has ranked research systems this way in yearly editions since 2020, still describes excellent speech quality in difficult real-world noise as an open problem.
Why an AI denoiser keeps your co-host
A speech enhancement model is trained to keep speech, any speech. If your co-host's voice leaks into your microphone, the denoiser treats it as voice and leaves it alone. Spill between microphones is an editing and level problem, not a noise problem, and it is handled by recording separate tracks and editing them, as described below.
What AI Noise Removal Cannot Fix (and the Artifacts to Listen For)
Any honest audio noise remover has limits, and knowing them stops you blaming the tool, or yourself, for something no software can do. These are the cases where cleanup will disappoint you:
- Echo and reverb. It is your voice, delayed, so a noise remover keeps it. Fix the room or move closer.
- A loud noise on top of a word. A siren, bark or slammed door overlapping speech shares the voice's frequencies at the same instant. Expect it to be reduced, not erased. Cut it or re-record the line.
- Clipping. If the recording was too hot and the peaks flattened into distortion, the information is gone. Noise removal does not touch it, and it can make the crackle more obvious.
- A voice far quieter than the noise. When the speech is barely above the room, there is not enough voice for any model to recover cleanly, and you will hear it working.
- Bad codec audio. A guest recorded through a video call with heavy compression has already lost detail. Cleanup can lower the noise but cannot put back what the codec threw away.
The other limit is over-processing, and it is the one people miss because the result looks clean on the waveform. Listen on headphones, at a normal volume, to a passage you know well, and switch between the original and the cleaned file. These are the signs that the cleanup has started eating the voice:
- Warble or a watery, underwater quality in the voice, especially on sustained vowels. This is the musical noise described above.
- Lisping or dull S sounds. Sibilance looks like noise to a crude denoiser, so it gets thinned.
- Swallowed word endings. Quiet final consonants, the t in "don't" or the s in "plans", fade out because they sit near the noise level.
- Pumping room. The background vanishes during speech and swells back in the pauses, or the pauses become dead digital silence that sounds like the line dropped.
- A thin, phone-like voice after aggressive low-frequency cleanup that took the warmth of a deep voice with the rumble.
If you hear any of them, use less. A little residual room sound under a natural voice is far less distracting to a listener than a perfectly silent background behind a voice that sounds processed.
↗ Try the tool
Studio Rescue
Studio Rescue is VoiceEditSuite's AI noise remover. It strips hiss, mains hum, fan wash and room noise while the voice stays untouched, runs on our own servers so your audio never goes to a third party, and measures your noise floor before and after so you see real numbers. It takes up to 60 minutes per file, at about 10 seconds of processing per minute of audio. It cannot fix echo or reverb, and it says so.
Open Studio Rescue →How to Clean Up Podcast Audio Online: The Right Order
Most people who say their podcast cleanup took hours did the right steps in the wrong order, and had to redo some of them. The order below is the one where each step makes the next one easier and nothing has to be repeated.
- Keep the raw files. Export or download every person's track at its original quality, WAV if you have it, and keep a copy you never edit. Every later step is reversible only if the original still exists.
- Listen to a pause on each track and name the noise. Hiss, hum, room, intermittent or echo. If it is mostly echo, cleanup will not help much, and you should know that before you spend time on it.
- Remove the noise, one track at a time. Run each person's track through the noise remover separately, before any editing, with no gain added first. Check each result for the artifacts above.
- Do the editing clean-up. Now quieten breaths, remove false starts, fluffed retakes and off-mic chatter, tighten dead air and, if you want, filler words. On separate tracks, keep the edits in sync so the conversation still lines up.
- Balance the voices. Bring every person to a similar level so nobody is reaching for the volume when the guest speaks. Why Your Guest Sounds Quieter Than You has the detail.
- Mix, then set loudness once. Combine the tracks with any music, then run one loudness pass on the finished episode: -16 LUFS integrated for Apple Podcasts and most platforms, or -14 for Spotify and YouTube, with true peak at or below -1 dBTP. Measure the file you will actually upload.
Why the order matters
Noise first, because everything else reads the quiet parts. Breath detection, pause tightening and gap filling all work by looking at the low-level audio between words. If that audio is full of fan noise, a breath and a fan look alike, pauses are harder to find, and any gap that gets filled is filled with noisy room tone. Clean the noise first and those tools see a quiet room with a voice in it, which is what they are designed for.
No gain before noise removal, because gain raises the noise too. It is tempting to turn a quiet guest up first so you can hear what you are doing. That raises their room noise by exactly the same amount, so the noise remover has more to take out and works harder on the voice. Clean at the recorded level and balance afterwards.
Loudness last, because loudness is a measurement of the finished file. Integrated loudness is an average of the whole programme. Cutting a minute of dead air, removing breaths or adding a music bed all change that average. Set it before the edit and your -16 is no longer -16 when you export. Set it last, once, on the finished mix, and measure the result: that is the number the platforms will see. We cover the targets in Podcast Audio Standards 2026.
Multi-Voice Episodes: Clean Each Track, Not the Mix
If your show has a co-host or guests, the single biggest improvement you can make is to record each person on their own track, either on separate inputs of one interface or with each remote guest recording locally, and to clean those tracks before anything is mixed. There are three reasons it beats cleaning the finished mix.
First, every person has different noise. The host's dynamic mic in a treated room might have almost none; the guest on a laptop in a kitchen might have a fridge, a fan and a window. A noise remover run on the mix has to find a single compromise, so it either under-cleans the guest or over-cleans the host. Per track, each voice gets exactly as much as it needs. Second, noise adds up. Two or three open microphones each contribute their own room, so the mixed background is louder than any one of them, and every person's noise plays under every other person's words. Clean each track and the noise in the mix drops for everyone at once. Third, levels can be set properly. Once each track is clean, you can bring every voice to the same level without raising anyone's noise, and only then mix.
Studio Rescue has an Episode mode built for exactly this. It takes one file per person, cleans each track, brings every voice to the same level, and returns the stems plus a finished mix in one download. Auto Clean Up then handles the editing side across those same tracks: it takes several files at once, and its keep-in-sync setting makes no cuts at all, so every track keeps its exact timing and the voices still line up when you mix them. Breaths are quietened in place, levels are evened, and the cutting is done once, on the mixed episode, so nobody ends up answering a question before it was asked.
If you only have a single mixed recording, from a call platform that did not save separate tracks or a single mic shared by two people, you can still clean it. Use a lighter setting, listen carefully to the quietest person, and plan to record separate tracks next time. It is the cheapest upgrade in podcasting.
↗ Try the tool
Auto Clean Up
Auto Clean Up is the editing half of the job. It transcribes the episode so you edit the audio by editing the words, quietens every breath in place with the pause kept at its natural length and filled with your own room tone, drops false starts, fluffed retakes and off-mic chatter, tightens dead air, can remove filler words, and lists every decision so you can keep any breath or line with one click. It learns each person's pacing, and it takes several files at once, with a keep-in-sync setting for episode tracks.
Open Auto Clean Up →How to Judge an AI Audio Cleaner or Podcast Audio Enhancer
Search for a podcast audio enhancer and you will find dozens, many of them free to try, and almost all of them sound impressive on the demo clip they chose themselves. Judge them on your audio and on these five questions instead.
- Where does my audio go, and what happens to it afterwards? Many online enhancers pass your file to a third-party AI service. Read the privacy page for three things: whether the processing happens on the company's own servers, whether the file is deleted afterwards, and whether your voice can be used to train AI models. Your voice is your show; a clear no on training should be written down, not implied.
- Does it measure, or only claim? A good tool tells you the noise floor before and after in decibels, so you can see what changed and compare tools fairly. A slider labelled "enhance" with no numbers gives you nothing to check.
- What does it do to the voice? Test with your worst file, not your best: the guest on the laptop, the episode with the fan. Listen on headphones for the artifacts listed above. Some enhancers also add EQ, compression or a synthetic "studio" tone on top of the noise removal; that can sound good on a weak recording and odd on a good one, and it makes your host and guests sound like the same processor rather than like themselves.
- Is it honest about its limits? A tool that says it removes echo as easily as hiss, or that promises studio sound from any recording, is promising something the research does not support. A file-length limit, a stated processing time and a plain statement of what it cannot fix are signs of a tool you can plan around.
- Does it fit a podcast workflow? Can it take one file per person? Does it keep tracks in sync? Does it separate noise removal from editing and from loudness, so you can do them in the right order, or does it bundle everything into one pass you cannot adjust?
For what it is worth, here is how VoiceEditSuite answers those questions. Uploaded audio is processed, then deleted. It is never used to train AI and it is never sold or shared, and the full promise is on the Your Audio page. Studio Rescue shows the measured noise floor before and after, and the Loudness Normalizer delivers at -16 LUFS for Apple and most podcast platforms or -14 LUFS for Spotify and YouTube, with true peak held under -1 dBTP, then re-measures the result. Noise removal, editing clean-up and loudness are separate tools, so you can run them in the order above. Everything for an episode is on the For Podcasters page, and the no-hours editing workflow is in How to Clean Up Podcast Audio Without Spending Hours in the Editor.
Frequently Asked Questions
What is the best way to remove background noise from a podcast?
Stop as much of it as you can before recording, by getting closer to the mic, switching off fans and appliances and recording separate tracks. Then run each track through an AI noise remover before you edit, and set loudness last. Software removes steady noise well; prevention is what deals with everything else.
Can AI remove echo from podcast audio?
Not with noise removal. Echo and reverb are your own voice arriving late off the walls, and a noise remover is built to keep voices. Dedicated dereverberation can soften mild room sound a little, but a ringing room is fixed with soft furnishings and a closer microphone. A free room check such as Home Studio Analysis tells you how much echo you have before you buy anything.
Will noise removal make my voice sound robotic?
Only if it is overdone or the noise was much louder than the voice. Listen for warbling vowels, dull S sounds, clipped word endings and a background that pumps in and out. If you hear them, use a lighter setting or fix the recording, and accept a little natural room sound rather than a processed voice.
Should I remove noise before or after editing?
Before. Breath detection, pause tightening and gap filling all read the quiet parts of the recording, and they work far better when those parts are clean. Set the final loudness after both, because editing changes the average loudness of the file.
Is it safe to clean up audio online?
It depends entirely on the service. Before you upload, check whether the audio is processed on the company's own servers or sent on to another AI provider, whether it is deleted afterwards, and whether it can be used for training. If the privacy page does not say, assume the answer is not the one you want.
What is the difference between an AI audio cleaner and a podcast audio enhancer?
The names are used loosely. A cleaner usually means noise removal alone. An enhancer often adds EQ, compression and loudness on top, sometimes in a single pass you cannot adjust. For a podcast, separate steps are better: noise removal per track, then editing, then one measured loudness pass on the finished mix.
Sources and Further Reading
- S. F. Boll, Suppression of acoustic noise in speech using spectral subtraction, IEEE Transactions on Acoustics, Speech, and Signal Processing, vol. 27, no. 2, April 1979: the original spectral subtraction method, tested on helicopter-cockpit speech.
- J.-M. Valin, A Hybrid DSP/Deep Learning Approach to Real-Time Full-Band Speech Enhancement, MMSP 2018, and the author's explainer, RNNoise: Learning Noise Suppression: 22-band gains from a recurrent network, the pitch filter, and why band gains avoid musical noise.
- H. Schröter, A. N. Escalante-B., T. Rosenkranz and A. Maier, DeepFilterNet: A Low Complexity Speech Enhancement Framework for Full-Band Audio based on Deep Filtering, ICASSP 2022: the two-stage envelope and deep-filtering design.
- ITU-T, Recommendation P.835: Subjective test methodology for evaluating speech communication systems and terminals providing noise suppression functionality, and H. Dubey et al., ICASSP 2022 Deep Noise Suppression Challenge: rating speech, background and overall quality separately.
- E. J. Newman and N. Schwarz, Good Sound, Good Research: How Audio Quality Influences Perceptions of the Research and Researcher, Science Communication, 2018.
- ACX, ACX Audio Submission Requirements: the -60 dB RMS noise floor benchmark.
- Apple, Audio requirements for Apple Podcasts: the -16 LKFS loudness and -1 dBFS true peak recommendation.
- VoiceEditSuite Guides: Removing Background Noise from a Voice Over Recording, Ground Loop Hum, Room Tone and Noise Floor and Recording a Podcast in a Bedroom.