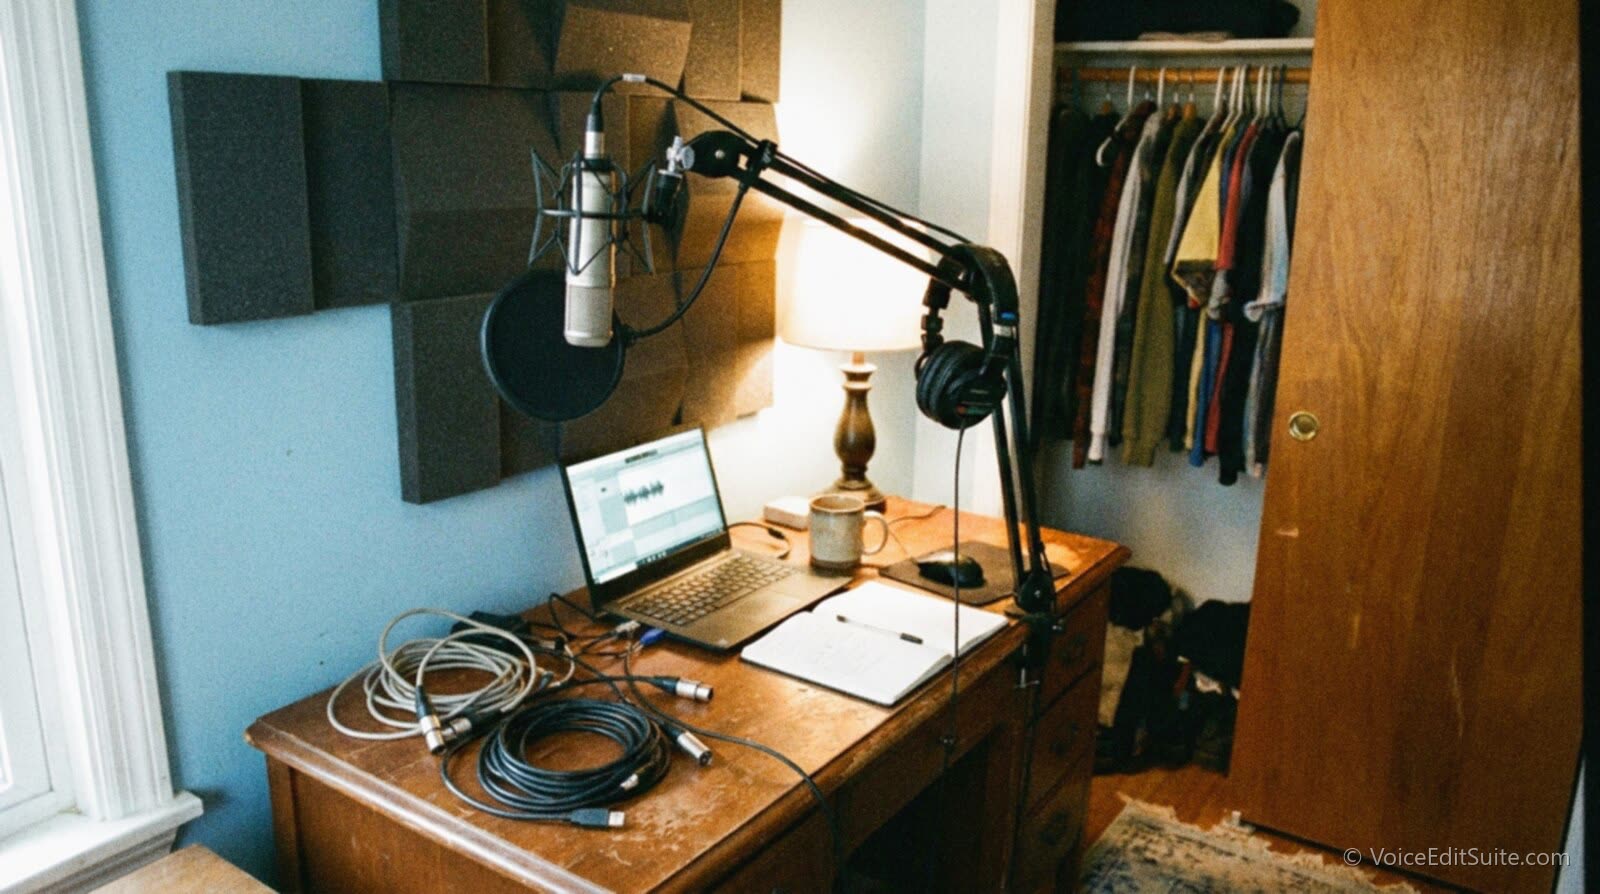
The short answer: a usable home voice-over setup starts around $193 if you already own a laptop, climbs to roughly $818 for a genuinely professional-sounding mid-range booth, and lands past $2,206 for a dedicated, broadcast-quality room before you add a prebuilt isolation booth, which alone can run $7,600 or more. None of those figures include the computer, and all of them keep growing a little every year through software subscriptions, electricity, replacement parts, and insurance that most starter budgets never account for. This guide breaks down exactly where that money goes at each tier, with real, current prices rather than vague ranges, so you can budget for the studio you are actually going to build rather than the one a gear review told you to want.
This is not a best-microphones-of-2026 roundup. It is a financial breakdown built the way a working voice actor or podcaster actually budgets: by tier, by category, and by what keeps costing money after the first purchase. The three tiers below cover an apartment setup good enough for corporate e-learning and audiobook auditions, a mid-range booth that can comfortably handle paid commercial and animation work, and a professional-grade room built close to what many ongoing corporate and union clients expect. Whichever tier fits your current budget, the categories stay the same: microphone, interface, acoustic treatment, computer and software, and the ongoing costs nobody puts on the gear list.
The Three Budget Tiers, and What Changes Between Them
Three numbers are worth holding in your head before any of the line items below: about $193, about $818, and about $2,206. Those are the worked totals for a bare-minimum apartment setup, a solid mid-range booth, and a professional-grade room, respectively, built from real current prices rather than a vendor's suggested bundle. Sound On Sound's own home-studio primer put the underlying truth plainly years ago, and it still holds: building a home studio is "probably cheaper than you think, provided you spend your money wisely." The spending-wisely part is what the rest of this guide is actually about.
- Tier 1, the apartment setup (about $193): a USB mic, basic closed-back headphones, a boom arm, and free software, run out of a closet or a blanket-draped corner.
- Tier 2, the mid-range booth (about $818): an XLR mic and a dedicated interface, real foam panel treatment, better headphones, and a one-time DAW license.
- Tier 3, the professional-grade room (about $2,206 and up): a broadcast-standard dynamic mic with a gain booster, a step-up interface, whole-room treatment, and a subscription DAW, before any dedicated isolation booth.
Tier 1: The Bare-Minimum Apartment Setup (About $193)
A bare-minimum setup earns its name honestly: it is built to get a first few paying jobs recorded at an acceptable level, not to compete with a professional studio. Every piece of gear in this tier is chosen because it does one job competently and cheaply, not because it is the best available option at any price. Our guide to budget microphones for voice over goes deeper into the trade-offs within this specific price class if you want to compare models rather than take the single recommendation below.
- Microphone: a USB condenser, about $109. RODE's NT-USB Mini launched at $99 and currently lists for around $109 at major US retailers; it plugs straight into a laptop with no separate interface needed.
- Headphones: a basic closed-back pair, about $59. Audio-Technica's ATH-M20x is the one piece of gear in this tier built for sustained professional monitoring rather than casual listening, and it currently lists around $59 at electronics retailers.
- A desk boom arm and basic shock mount, about $25. This is the line item that varies most by brand, and usually the easiest place to save a few dollars without actually hurting the recording.
- Acoustic treatment: $0, if you already own blankets and pillows. A closet hung with clothes, or a corner lined with moving blankets and couch cushions, does most of the real work at this budget. See acoustic treatment on a budget and soundproofing a window without construction for how to do this properly rather than just draping a blanket over your head.
- Software: $0. Audacity, the free, open-source audio editor, handles basic recording, editing, and noise reduction competently enough for a beginner's first paying jobs.
Add those five line items up and this tier lands at roughly $193, assuming you already own a laptop capable of running basic recording software, which most machines built in the last six or seven years can. The real constraint at this tier is rarely the gear itself; it is the room. A $109 microphone in a genuinely quiet, well-damped closet routinely beats a $400 microphone in an untreated living room with traffic noise leaking through a single-pane window, which is exactly the gap the two guides linked above are built to close for free or close to it.
Tier 2: The Solid Mid-Range Booth (About $818)
The mid-range tier is where most working voice actors and serious podcasters actually end up living, because it is the first tier where the gear stops being the limiting factor on a finished recording. An XLR microphone paired with a dedicated interface produces a materially cleaner, more controllable signal than any USB mic can manage, and the jump in acoustic treatment from a blanket-draped corner to genuine foam coverage closes most of the remaining gap to a professional sound. Our audio interface buying guide explains why the interface, not the microphone, is usually the smarter place to spend the first extra dollar in this tier.
- Microphone: a cardioid XLR condenser, about $99. The Audio-Technica AT2020 remains the standard reference point for this tier; price trackers put it anywhere from $99 to about $129 depending on the retailer and the week.
- Audio interface: about $160. Focusrite's Scarlett Solo 4th Gen, the long-running default recommendation for a single-mic home setup, lists for $159.99 at Walmart as of this writing.
- Acoustic treatment: about $349. A 12-pack of 2-inch Auralex Studiofoam pyramid panels, enough to meaningfully tame flutter echo and early reflections in a small room corner, runs $349 at Sweetwater. A full closet conversion can do a similar job for less; foam buys convenience and even coverage, not a fundamentally different physical result.
- Headphones: about $110. The Sony MDR-7506, a broadcast and film-industry standard for decades, averages around $110 across major retailers.
- A better boom arm, pop filter, and shock mount: about $40. Worth the upgrade over tier one's bargain hardware mainly because a cheap boom arm sagging under a heavier XLR mic over time is a genuinely common, avoidable failure.
- Software: a one-time $60. Reaper's discounted personal license, from the independent developer Cockos, is a flat one-time fee rather than a subscription for anyone earning under $20,000 a year from the software's use, and it is a fully capable DAW, not a stripped-down trial version.
Running an XLR setup through a USB interface introduces one more variable a USB-mic setup never has to think about: driver-level audio latency between what you say into the mic and what you hear a fraction of a second later in your headphones. It is usually a solvable annoyance rather than a real problem, and our guide to fixing audio interface latency and dropouts covers the handful of settings that resolve almost every case, but it is worth knowing about before a first paid session rather than discovering it mid-read.
The foam-versus-DIY question is worth taking seriously rather than defaulting to whichever option looks more like a real studio in photos. A dozen foam panels absorb mid and high frequencies efficiently and look tidy on a video call, but they do comparatively little about bass buildup in a small untreated room, and a thick moving blanket or a closet full of clothes can outperform a thin foam panel at the low end simply by having more mass behind it. The honest answer is that most home setups benefit from both: a little foam at the main reflection points, and soft, dense material doing the bulk of the absorption work everywhere else.
Tier 3: The Professional-Grade Room (About $2,206 and Up)
A professional-grade room is built for a different kind of client relationship: ongoing corporate and union work, audiobook publishers with strict technical delivery specs, and video game or animation studios that will reject a file outright if the noise floor or frequency response falls outside their standard. Every category gets a real upgrade at this tier, not just the microphone, because a single excellent microphone in a mediocre room still sounds like a mediocre room.
- Microphone: about $439. The Shure SM7B, the dynamic mic that shows up behind more professional voice-over and broadcast setups than any other single model, currently lists at $439 through Shure's own US store.
- A gain booster for that mic: about $149. The SM7B's output is notoriously quiet, and most interfaces cannot push enough clean gain into it on their own. A Cloudlifter CL-1 inline preamp, from Cloud Microphones, sits between the mic and the interface and adds up to 25 dB of clean gain; it lists for $149 direct from the manufacturer.
- Audio interface: roughly $200. A step up from tier two, such as Focusrite's Scarlett 2i2 4th Gen, typically sells somewhere between about $145 on sale and close to $230 at full price depending on the retailer and the month.
- Whole-room acoustic treatment: about $949. Auralex's Project 2 Roominator kit, 24 Studiofoam wedge panels sized for a room up to 100 square feet, runs $949 at Sweetwater, a genuine step up from a dozen foam squares toward real coverage of a room's major reflection points.
- Headphones: about $110. The same Sony MDR-7506 as tier two remains the standard reference at every budget level above the cheapest; there is little reason to spend more specifically for voice-over monitoring.
- Software: Pro Tools Studio, $299 a year. Avid's mid-tier Pro Tools subscription, one step above the $99-a-year Artist tier and one below the $599-a-year Ultimate tier, is close to the audio industry's default professional standard, per Avid's own published subscription tiers.
- Cables, stands, and a proper pop filter: about $60.
Add those seven line items together and this tier totals roughly $2,206, not counting a computer upgrade if your current machine is aging, and not counting a dedicated isolation booth. A manufactured booth is a genuine category above a treated room rather than an extension of it: WhisperRoom's own online store lists its Voice Over Basic package at $7,714 and its Work From Home Booth at $7,618.05, both before any of the acoustic or lighting add-ons sold alongside them. A well-treated room gets you most of the way to a booth's isolation for a fraction of the cost; a booth buys consistency across moves, landlords, and noisy neighbors that no amount of foam on a bedroom wall can promise. Our guide to mic stands, shock mounts, and vibration isolation covers the smaller mechanical upgrades, stands, isolation pads, cable routing, that matter disproportionately once a room is this quiet, because at this noise floor a stand transmitting footstep vibration through a desk becomes audible in a way it never was in a noisier room.
↗ Try the tool
Home Studio Analysis
Not sure which of these three tiers actually matches what your current clients expect, or whether your existing setup already clears the bar? The free Home Studio Analysis tool checks your actual recording against real technical benchmarks, noise floor, frequency response, room reflections, rather than asking you to guess from a gear list, so you can spend the next dollar on whatever your room genuinely needs instead of whatever tier you happen to be closest to already.
Open Home Studio Analysis →The Costs Nobody Puts on the Starter Gear List
Software Subscriptions
A DAW is the one category in every tier above where the ongoing cost can quietly exceed the original hardware spend within a few years, because several of the biggest names in the category have moved to subscription pricing. Adobe Audition's single-app plan runs $20.99 a month on an annual commitment, or $33.99 month to month, and the full Creative Cloud All Apps bundle runs $52.99 to $54.99 a month depending on the current offer. Avid's Pro Tools now ships in three subscription tiers, Artist at $99 a year, Studio at $299 a year, and Ultimate at $599 a year, a real departure from the perpetual-license model the software used for decades. Reaper, built by the small independent developer Cockos, remains the clear exception: a $60 discounted personal license, available to anyone earning under $20,000 a year from the software, and a $225 commercial license above that threshold, are both one-time purchases with no recurring fee at all, which is most of why Reaper shows up as the default DAW recommendation in both the tier-one and tier-two budgets above. Our guide to choosing a DAW for voice-over editing compares the actual editing workflow differences between these options, which matter as much as the price once you are editing for hours every week.
Electricity and Utilities
Electricity is a real but genuinely small line item for almost every home voice-over setup, and it is worth doing the actual math once rather than worrying about it indefinitely. The US Energy Information Administration's own tracked data put the national average residential electricity price at 18.3 cents per kilowatt-hour in June 2026, up about 5 percent from a year earlier. A laptop, a small audio interface, and a desk lamp together draw somewhere around 100 to 150 watts while actively recording, nowhere near a desktop gaming rig's draw. Run that load three hours a day for a month at the national average rate and the electricity cost comes in under $2.50 for the entire month. Even a power-hungry desktop editing rig pulling 400 watts for four hours a day most days lands under $9 a month, and a dehumidifier running to protect gear and foam in a humid climate, covered in more depth in our guide to humidity, temperature, and home studio equipment, typically adds a few dollars more on top of that. None of this moves the needle on which tier makes financial sense.
Maintenance and Replacement
Gear does not stay in the condition you bought it in, and almost no starter budget accounts for that. Foam panels collect dust and lose some absorption efficiency over five to ten years, a slow enough decline that few people notice until they compare a fresh panel against an old one directly. Shock mount elastic bands perish and need replacing roughly every one to three years depending on how much the mic gets handled, XLR cables develop intermittent connection faults at the connector long before the cable itself visibly fails, and a dynamic mic capsule can pick up enough dust and plosive moisture over years of daily use to measurably dull its top end. Our guide to mic stands, shock mounts, and vibration isolation covers what to inspect and replace, and how often. None of these failures are expensive individually, usually single-digit to low double-digit dollar amounts each, but budgeting zero dollars a year for all of them combined is how a studio that sounded great at setup sounds subtly worse three years later with nobody able to say exactly why.
Insurance
Most people assume their existing renters or homeowners policy already covers a home studio, and that assumption is usually only partly true. Standard homeowners and renters policies commonly cap payouts for unscheduled personal property, the general bucket electronics usually fall into, somewhere between $1,000 and $2,500 per category, according to coverage guides from both The Zebra and Policygenius, which is well under a tier-two or tier-three total once you add it all up. Both guides also flag a separate problem that catches working voice actors specifically: standard personal-property coverage commonly excludes property used for business purposes, and recording paid commercial work from a spare room is exactly that. The fix, where it is needed, is a scheduled personal property rider covering the specific appraised gear at full value, or a dedicated business-use policy, and the only reliable way to get an actual dollar figure is a quote from your own carrier, since cost depends on your coverage amount, your state, and your existing policy terms. Our guide to backup gear and redundancy for voice actors covers the related, cheaper policy almost nobody buys on purpose: a second, lesser microphone and cable kept ready so a single piece of failed gear never costs you a booked session, which matters more day to day than most insurance riders ever will.
That gap between what a studio costs to build and what it costs to actually keep running is the part most new voice actors underbudget for, and it is also where the single most useful piece of advice in this category tends to come from working audio engineers rather than gear marketing copy.
"Buy the best thing that you can possibly afford."
That advice cuts against the instinct to buy the absolute cheapest version of everything in tier one and upgrade constantly, piece by piece, for years. A cheap interface replaced within eighteen months because its preamps add audible noise was never actually the budget option; it was a down payment on the interface you were always going to need to buy anyway, with an extra $150 or so wasted in between on a piece of gear that spent its whole life getting in the way of the one in front of it.
Which Tier Should You Actually Build?
The honest answer depends less on how much money you have available right now and more on how certain you are about the kind of work you are chasing. Someone testing whether voice-over work is viable at all, auditioning for the first time with no booked clients yet, is rarely well served by jumping straight to a $2,206 room; the $193 tier gets a usable demo and a first few small jobs recorded while that question is still genuinely open. Someone already booking paid commercial, e-learning, or animation work on a semi-regular basis has usually already outgrown tier one's ceiling and is better served putting the next available few hundred dollars into tier two's interface and treatment, in roughly that order, since the interface determines the signal's basic quality and the treatment determines how much of a finished edit is spent fighting room noise rather than performance notes.
What that breakdown actually shows is less about any one product and more about where the money goes once you move past a bare-minimum setup: acoustic treatment, not the microphone, is the single biggest line item in a realistic mid-range budget, the opposite of what most gear-focused buying guides imply by leading every article with a microphone recommendation. A tier-two buyer who spends $300 on a slightly nicer microphone and $50 on foam has flipped that ratio backward and will hear the difference immediately on playback, usually as room noise and flutter echo rather than anything the microphone itself did wrong.
A note on these numbers
Every price in this guide is a snapshot taken in November 2026 from manufacturer pages and major retailers, and retail prices for exactly this kind of gear move constantly with sales, currency shifts, and new model releases. Treat the worked totals here as a realistic shape of the budget, not a guarantee of what you will pay on the day you buy. If you spot a figure that has gone stale, particularly anything tied to a specific retailer rather than a manufacturer's own list price, treat the tier logic and the category breakdown as the lasting part of this guide, and the exact dollar figures as the part most likely to need a correction first.
Frequently Asked Questions
What is the absolute cheapest way to start recording paid voice-over work from home?
A USB condenser microphone in the $99 to $110 range, a pair of genuinely closed-back headphones rather than open-back or earbuds, and a blanket-draped closet corner covers the floor of what a paying client will accept, and the whole kit runs under $200 if you already own a laptop. Free software, Audacity most commonly, handles the recording and basic cleanup. This setup will not win every audition against someone running tier two or three, but it is enough to find out whether the work itself is viable before spending real money.
If I can only afford one upgrade, should I buy a better microphone or better acoustic treatment first?
Treatment, almost every time. A great microphone in an untreated room still records the room: flutter echo, a hollow boxy tone, and background noise the microphone cannot distinguish from your voice. A decent microphone in a well-treated space routinely sounds more professional on playback than an expensive microphone in a bad one, because listeners and casting reviewers react to room sound far more reliably than they can identify a specific microphone model by ear.
Is a prebuilt isolation booth like a WhisperRoom worth the cost over DIY treatment?
It depends on which problem you actually have. A manufactured booth solves isolation, keeping outside noise out and your own sound from bothering neighbors or housemates, far more reliably than foam added to existing walls, because isolation is primarily about mass and sealed air gaps rather than absorption. If your current space is already reasonably quiet and your main issue is room tone and reflections, a well-executed DIY treatment, as covered in our guide to acoustic treatment on a budget, solves that specific problem for a small fraction of a booth's price. A booth earns its roughly $7,600 to $7,700 price tag mainly for people whose actual obstacle is an uncontrollably noisy environment, not a reflective one.
Should I pay for a DAW subscription, or buy a one-time license?
For most voice-over and podcast editing work, which rarely needs the deepest video-post or music-production features in Pro Tools or the full Adobe Creative Cloud suite, a one-time license covers the job completely. Reaper's $60 discounted personal license is the clearest case: a fully capable editor with no recurring cost at all. A subscription earns its ongoing fee when you specifically need features tied to an active plan, such as Adobe's cloud-based collaboration tools or Pro Tools' tight integration with a post-production pipeline that already standardizes on it.
Do I actually need separate insurance for home studio gear?
If your total gear value sits comfortably under your homeowners or renters policy's personal-property sublimit, usually somewhere between $1,000 and $2,500 depending on the carrier, and you are not using the space for paid business work, you may already be adequately covered. Once your gear total clears that threshold, which happens by tier two for most people, or once you are recording paid commercial work from the space, which can trigger a business-use exclusion in a standard policy, a scheduled personal property rider or a separate business policy is worth an actual quote from your carrier rather than an assumption either way.
Is it normal for home studio costs to keep creeping up after the initial build?
Yes, and budgeting for that upfront avoids an unpleasant surprise later. Software subscriptions, if you choose that route, accumulate every month whether or not you are actively billing clients that month. Foam and shock mount hardware degrade gradually over years rather than failing all at once. And almost every voice actor who stays in the work for more than a year or two ends up spending at least a little more on incremental upgrades, a second mic for travel, better monitoring, a dedicated boom pole, than their original tier's budget anticipated. None of that means the original budget was wrong; it means the original budget was for the studio's first year, not its fifth.
Sources and Further Reading
- Walmart, RODE NT-USB Mini listing and GearNews, Can RØDE conquer the USD 99 market with the NT-USB Mini microphone?: the Tier 1 microphone's launch and current retail price.
- CDW, Audio-Technica ATH-M20x listing and RTINGS, Audio-Technica ATH-M20x review: the Tier 1 headphone price and its place in Audio-Technica's lineup.
- Equipboard, Audio-Technica AT2020 pricing: the Tier 2 microphone price range.
- Walmart, Focusrite Scarlett Solo 4th Gen listing: the $159.99 Tier 2 interface price.
- Sweetwater, Auralex 2-inch Studiofoam Pyramids 12-pack and Sweetwater, Auralex Project 2 Roominator kit: the Tier 2 and Tier 3 acoustic treatment prices.
- Equipboard, Sony MDR-7506 pricing: the $110 average headphone price used in Tiers 2 and 3.
- frontdeskreview.com, Shure SM7B price and specs: the $439 Tier 3 microphone price.
- Cloud Microphones, Cloudlifter CL-1 product page: the $149 gain-booster price and function.
- Equipboard, Focusrite Scarlett 2i2 4th Gen pricing and Slickdeals, Focusrite Scarlett 2i2 4th Gen listing: the Tier 3 interface price range.
- WhisperRoom's online parts and booth store: the Voice Over Basic and Work From Home Booth package prices.
- Capterra, Pro Tools pricing: the Artist, Studio, and Ultimate annual subscription tiers.
- Digital Camera World, Download Adobe Audition as a free trial or as part of Creative Cloud: Adobe Audition's monthly subscription prices.
- nailthemix.com, Reaper DAW Price: More Than Just a Free Trial for Metal?: Reaper's $60 discounted and $225 commercial license tiers.
- jouleio.com, kilowatt-hour cost by state, built on EIA Electric Power Monthly data: the 18.3-cent-per-kWh national average residential electricity price used in this guide.
- The Zebra, Musical Instrument Insurance and Policygenius, Musical Instrument Insurance: standard homeowners and renters policy sublimits and business-use exclusions.
- Happy Mag, What you need to build a home studio, according to an audio engineer: the Nick Franklin quote used in this guide.
- Sound On Sound, Looking To Put Together A Home Studio?: the framing referenced early in this guide.