
The correct order for a podcast mastering chain is noise reduction first, then editing cleanup, then corrective EQ, then a noise gate, then compression, then de-essing if the voice needs it, then a limiter, and loudness normalization last, measured on the finished file. Each stage in that list makes an assumption about what the audio already looks like when it arrives, and running them out of order breaks that assumption: compressing before gating raises the noise floor along with the voice, EQ-ing before compression changes which part of the voice the compressor reacts to hardest, and setting loudness before the edit is finished means the number drifts the moment you cut another breath.
This Guide is the synthesis of four narrower ones already on this blog, on removing background noise, gain staging, gates and compressors, EQ and loudness standards. Each of those covers one stage in depth. This one walks the whole chain as a single worked example on one real two-host episode, so you can see exactly where one stage hands off to the next, and what happens to the file when a step gets skipped or moved.
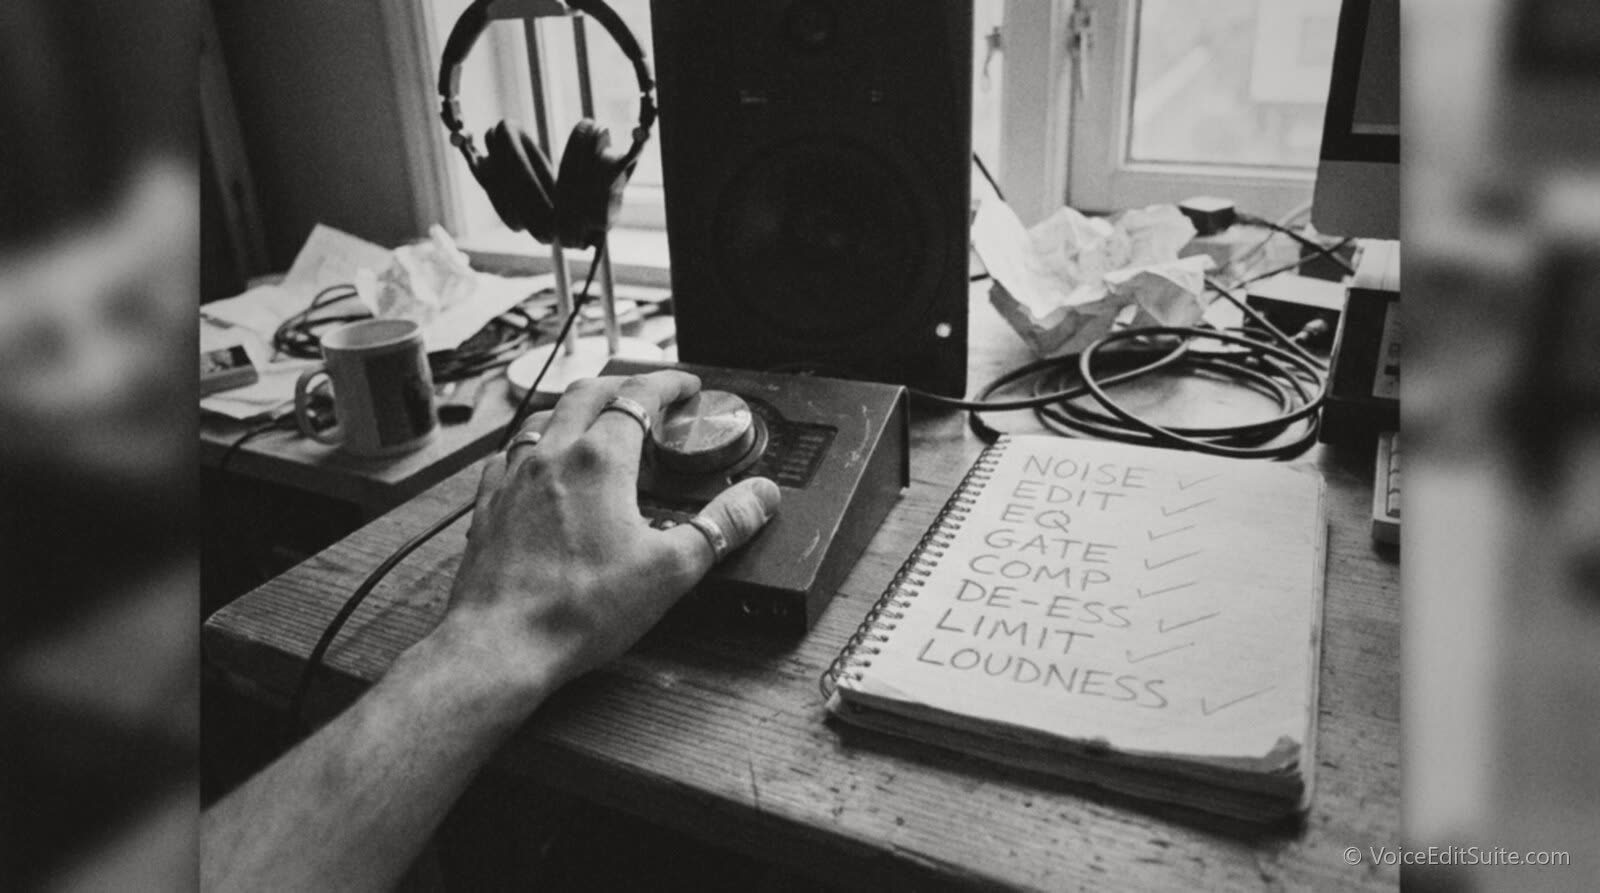
A mastering chain is not eight independent tools you can run in any sequence and still get the same result. Each stage reads the file it is handed and reacts to whatever is actually there, loud or quiet, noisy or clean, long or already trimmed. Move a stage earlier or later and you are not just changing the order you hear things in; you are changing what the next tool thinks it is looking at.
Why the Order Is Not Arbitrary
Sound On Sound's technical editor Hugh Robjohns has answered the EQ-versus-compression question directly: a compressor generally reacts to the loudest part of a signal regardless of which frequency that energy sits at, so boosting or cutting a band ahead of the compressor effectively moves the compressor's threshold for that band specifically. Boost the presence range before the compressor and the compressor squashes the presence range harder than the rest of the voice, because that is now the loudest part of the signal reaching the detector. Put the same boost after the compressor and the two stages stay independent: the compressor reacts to the dynamics you actually performed, and the EQ shapes the result afterward.
The same logic explains why noise reduction, cleanup and corrective EQ sit ahead of the gate and the compressor rather than mixed in among them. A noise gate and a compressor both work by listening to level, not by understanding what is voice and what is room. If the file handed to them is already clean, trimmed to its final length and free of rumble, both tools have an easy, honest job: open and close around speech, even out a performance that is already free of distractions. If the file still has fan noise, false starts or a 60 Hz hum sitting under everything, the gate and compressor inherit that problem and often make it worse, because both of them raise or lower levels without knowing why a given moment is loud or quiet.
The Worked Example: One Real 45-Minute Episode
Take a two-host interview show. Host A records in a small, lightly treated spare room on a dynamic broadcast mic a hand's width from the mouth, with a deep voice. Host B records in a bedroom with a window air-conditioning unit, on a condenser mic set back slightly further, with a noticeably higher voice. Both tracks come in as separate mono WAV files, 48 kHz, 24-bit, each 52 minutes long before anything is cut, because the conversation ran long and both hosts fluffed a few lines.
Measured cold, Host A's track has a noise floor around -52 dB RMS in the pauses: a treated room and a close dynamic mic do most of the work for you, as gain staging predicts. Host B's track measures -38 dB RMS, well above the -60 dB RMS benchmark ACX uses for audiobook noise floors and loud enough to be clearly audible under headphones. That gap between two hosts in the same episode is completely ordinary, and it is exactly why each stage below gets applied per track before anything is mixed.
Stages One Through Three: Clean, Edit, Then Shape the Tone
1. Noise reduction, before anything else touches the file
Each track goes through an AI noise remover on its own, at the gain it was recorded at, with nothing else applied first. Host A's noise floor drops from -52 dB RMS to about -58 dB RMS, a modest improvement because there was not much to remove. Host B's drops from -38 dB RMS to about -54 dB RMS: real progress, though the AC unit's broadband hum and the occasional small rattle when it cycles are only partly steady, so a noticeable amount survives. The detail that matters for order of operations is why this runs first: every later stage, starting with the editing pass, reads the quiet parts of the file to decide where a breath ends and where a pause begins, and those decisions are far more reliable on a file that is quiet where it should be quiet. Removing background noise from podcast audio covers the method and its limits in full.
2. Editing cleanup, now that the pauses are actually quiet
With both tracks clean, the editing pass removes four false starts, trims eleven long pauses, quietens ninety-odd breaths in place rather than cutting them out entirely, and drops a stretch of off-mic chatter while the hosts were getting settled. The episode goes from 52 minutes of raw material to 45 minutes and 10 seconds of finished conversation. This step has to come before EQ, gating and compression because it changes the file's actual content, not just its tone or level: cutting a false start removes several seconds of audio outright, and doing that after you have already set a gate's timing or a compressor's response on the longer file means redoing that tuning on a shorter one anyway. Editing first means every stage after it works on the file's real, final shape.
3. Corrective EQ, to stop low-end energy from driving what comes next
Each track gets a high-pass filter before anything else in the EQ stage: 80 Hz on Host A's deeper voice, 100 Hz on Host B's higher one, both at 12 dB per octave, following the same logic in EQ basics for voice. A sweep finds a boomy resonance near 280 Hz on Host A, partly from proximity effect at that close mic distance, fixed with a narrow 3 dB cut at a Q of 2. Both tracks share a faint hollow resonance near 650 Hz, which shows up on both voices in the same room and therefore belongs to the room rather than either person, so both get a 2 dB cut there. Nobody gets a presence boost yet, and that is deliberate: corrective EQ, the cuts that remove rumble, thump and resonance, goes before the gate and compressor specifically so that low-frequency energy does not drive either of them. A tonal boost, if one were needed, would wait until after compression, exactly as the EQ Guide above recommends.
Notice what these first three stages have in common: none of them are trying to make the voice sound polished yet. They are removing noise, removing unwanted material, and removing the parts of the frequency spectrum that cause trouble downstream. Everything from here on is shaping a file that is already clean, already the right length, and already free of rumble, which is what lets the gate and compressor do a small, honest job instead of a large, corrective one.
Stages Four Through Eight: Gate, Compress, De-Ess, Limit, Normalize
4. The noise gate, catching what cleanup and EQ left behind
Host A's track barely needs a gate at all; at -58 dB RMS in the pauses there is very little left to remove, and noise gates and compressors for voice makes the same point about a genuinely quiet recording needing a light touch or none. Host B's track still has the AC unit's residual drone surging slightly whenever the compressor cycles, so a gate with its threshold set at -46 dB, a 5 ms attack and a 150 ms release with a short hold, catches those surges in the gaps between words without touching anything at ordinary speaking level. The threshold sits just above the cleaned noise floor rather than hard against it, which is what keeps word endings from being clipped off.
This is also a good point to flag a naming collision that confuses people reading about loudness standards elsewhere in this chain: the ITU-R BS.1770 algorithm that measures integrated loudness, the one behind the EBU R128 broadcast standard, uses its own internal "gating" step to decide which parts of a programme count toward the loudness average, discarding passages below an absolute threshold of -70 LUFS and then applying a second, relative gate 10 LU below that. That is a measurement concept inside a loudness meter, nothing to do with the noise gate plugin on a vocal track, and the two should not be confused when you read about either one.
5. Compression, now working on a file that is already clean
With the noise gated and the corrective EQ in place, compression runs with a 3:1 ratio, a threshold around -20 dBFS, a 15 ms attack and a 120 ms release. Host B, whose delivery was less consistent at a slightly greater mic distance, needs about 5 dB of makeup gain to bring the quieter lines up to match the louder ones; Host A needs closer to 3 dB. Average gain reduction across the episode sits around 4 dB on each track, a light touch rather than a heavy one, which is only possible because the earlier stages already did the harder work. This is the step where running things out of order costs the most: had compression run before the gate, that same 4 to 5 dB of makeup gain would have lifted Host B's residual AC noise right along with the voice, turning a drone that was below -54 dB RMS into something closer to -50 dB RMS, now audible in every pause and requiring a second, more aggressive gating pass on an already-compressed signal, which is a worse starting point than the original file.
6. De-essing, after compression, before the limiter
Compression's makeup gain raises everything in the signal evenly, sibilance included, so de-essing sits after the compressor rather than before it: de-ess too early and the compressor's gain makeup can bring the esses right back up to a level that needed catching again anyway. A multiband de-esser centred near 6.5 kHz on Host A's voice and 7.5 kHz on Host B's, consistent with the ranges in EQ basics for voice, pulls 3 to 4 dB off the loudest esses on each track and leaves ordinary speech untouched. Sound On Sound's own guide to de-essing places sibilant energy for most voices somewhere between roughly 4 and 10 kHz, which is why the exact centre frequency has to be found by ear on each voice rather than copied from a chart.
7. The limiter, catching transients, not doing the leveling
Before limiting, the mixed episode's loudest moments, a hard consonant from Host A, a sudden laugh from Host B, peak at around +0.4 dBTP, which would clip after encoding to a lossy format even though nothing looks obviously wrong on a simple peak meter in the editor. A limiter set with a ceiling at -1 dBTP catches only those transients, averaging about 1.5 dB of reduction on the handful of moments that actually need it. The limiter is not doing the job of the compressor here; it is a safety ceiling for the rare peak that gets past everything above it, which is the only job a limiter should be doing on spoken-word material.
8. Loudness normalization, last, measured on the finished mix
Only now, with editing, EQ, gating, compression, de-essing and limiting all finished, does loudness get set. A two-pass loudness measurement on the finished 45-minute, 10-second mix comes back at -19.2 LUFS integrated, quieter than you might expect given everything that has already happened to it, because every stage above was deliberately gentle rather than aggressive. A gain of +3.2 LU brings the file to Apple Podcasts' -16 LKFS target, with true peak held at -1 dBTP by the same pass. Re-measuring the exported file confirms -16.0 LUFS integrated and -1.0 dBTP true peak: the number the platform will actually see, because it was measured on the file that is actually being uploaded, not on an earlier draft.
This is also exactly why loudness has to be the final stage and not an early one. Integrated loudness, the number behind every platform target, is an average across the whole programme, as podcast loudness standards explains in detail. Cutting the four false starts and eleven long pauses during editing removed nearly seven minutes of mostly quiet or silent material from this episode; had loudness been normalized before that edit, the average would have included all that near-silence, the normalization pass would have pushed the remaining speech louder than intended to compensate, and the -16 LUFS set before editing would simply not be -16 LUFS anymore once the cuts were made. The fix is not a smarter normalizer. It is doing the step last and measuring the file you are actually going to publish.
↗ Try the tool
Loudness Normalizer
The Loudness Normalizer is built to be the last stage in this chain, not a one-click fix for a chain that was never run in order. It measures your finished mix with a true two-pass loudnorm pass, applies the exact correction once, holds true peak at the platform's dBTP ceiling while it does it, and re-measures the result so the number you see is the number the platform sees. Presets cover Apple Podcasts, Spotify, YouTube, mono podcasts and EBU broadcast delivery.
Open Loudness Normalizer →Common Mistakes and What They Actually Cost
Almost every mastering chain that sounds worse than the raw recording got one of these three things backward, not because the person doing it didn't know what each tool does, but because nobody had explained why the sequence itself matters as much as the settings inside each stage.
- Compressing before gating. The compressor's makeup gain lifts the voice and the noise floor by the same amount, so whatever room sound was below the compressor's threshold comes out louder than it went in. A gate applied afterward now has to fight noise that is closer to speech level than it used to be, and a gate set aggressively enough to catch it risks chopping the quiet tail off real words.
- Boosting presence before compressing. A compressor reacts to whichever frequency band is loudest at that instant, regardless of what that band is. Boost 3 kHz ahead of the compressor and the compressor squashes 3 kHz harder than the rest of the voice, which can make consonants sound thin or oddly ducked relative to the body of the voice. Tonal boosts belong after compression; corrective cuts belong before it.
- Normalizing loudness before the edit is finished. Integrated loudness is an average over the whole file. Any later cut, a trimmed pause, a removed false start, a shortened breath, changes that average, so a loudness pass run early is measuring a file that no longer exists by the time you export.
- Running one bundled 'enhance everything' pass instead of separate stages. A single plugin or AI service that applies noise reduction, EQ, compression and loudness all at once in a fixed order you cannot see or adjust will sometimes get the sequence right and sometimes get it backward, and because the stages are hidden you cannot diagnose which one caused a given artifact.
What makes all three mistakes expensive is not that they sound disastrous on first listen. A compressed-then-gated file usually sounds fine until someone listens on headphones in a quiet room and notices the background pulsing in and out between sentences. A loudness pass run too early usually measures close enough to the target that nobody checks it again after the final edit, until a listener compares the episode to last week's and notices this one sits at a slightly different volume. The honest fix in every case is the same: run the stages in order, and re-measure the finished file rather than trusting a number from an earlier draft.
Frequently Asked Questions
What is the correct order for a podcast mastering chain?
Noise reduction first, then editing cleanup, then corrective EQ, then a noise gate, then compression, then de-essing if the voice needs it, then a limiter, then loudness normalization measured on the finished file. Each stage assumes the one before it was already done, which is the whole reason the order matters more than any individual setting.
Why does compressing before gating raise the noise floor?
A compressor's makeup gain turns the whole signal up to compensate for the gain reduction it applied, and that includes whatever room noise was sitting under the voice, not just the voice itself. If the gate hasn't removed that noise yet, compression makes it louder before the gate ever gets a chance to work on it.
Does EQ really have to go before compression?
Corrective EQ, a high-pass filter and narrow cuts for mud or resonance, should go before compression so that low-frequency energy doesn't drive the compressor's gain reduction. A tonal boost, such as a presence lift, is better placed after compression, since boosting a band before the compressor makes the compressor react more strongly to that specific band than to the rest of the voice.
Why does loudness normalization have to be the very last step?
Integrated loudness, the figure every platform target is built on, is measured as an average across the entire file. Any edit made after normalizing, cutting a pause, trimming a false start, shortening a breath, changes that average, so the measured loudness drifts away from the target the moment you keep editing. Normalize once, after every other stage, on the file you are about to export.
Do I need to run all eight stages on every episode?
No. A genuinely clean recording, a treated room, a close mic, consistent delivery, may need little or no gating and only light compression, the same point gates and compressors for voice makes. The order matters for whichever stages you actually use; it doesn't mean every stage has to do heavy work, or any work at all.
Is it safe to use one AI tool that does noise reduction, EQ, compression and loudness in a single pass?
It can work, but you lose the ability to tell which stage caused a problem if the result sounds off, and you can't confirm the tool is actually running the stages in the order described here rather than some fixed internal sequence that may not suit your file. Separate tools you can run, check and re-run in a known order give you more control, especially on a file with an uneven noise floor between two hosts.
Sources and Further Reading
- ITU-R, Recommendation BS.1770: Algorithms to measure audio programme loudness and true-peak audio level: the loudness measurement and true-peak algorithm behind LUFS and every platform spec referenced here.
- EBU, Tech 3341 / R 128: Loudness Normalisation and Permitted Maximum Level of Audio Signals: the -23 LUFS broadcast target, the -1 dBTP maximum true peak, and the two-stage absolute and relative gating used to compute integrated loudness.
- Apple, Audio requirements for Apple Podcasts: the -16 LKFS target with a ±1 dB tolerance and a true peak ceiling of -1 dBFS, calculated per ITU-R BS.1770-5.
- Sound On Sound, Q. Should EQ be used before or after compression?: Hugh Robjohns on why a compressor reacts to the loudest frequency band regardless of what it is, and how EQ placement shifts that.
- Sound On Sound, Vocal de-essing techniques: sibilant energy concentrated roughly between 4 and 10 kHz, and why a fixed EQ cut handles it worse than a de-esser.
- VoiceEditSuite Guides: Removing Background Noise from Podcast Audio, Gain Staging, Noise Gates and Compressors, EQ for Voice Over and Podcasts and Podcast Loudness Standards: the detailed single-topic guides behind each stage in this chain.